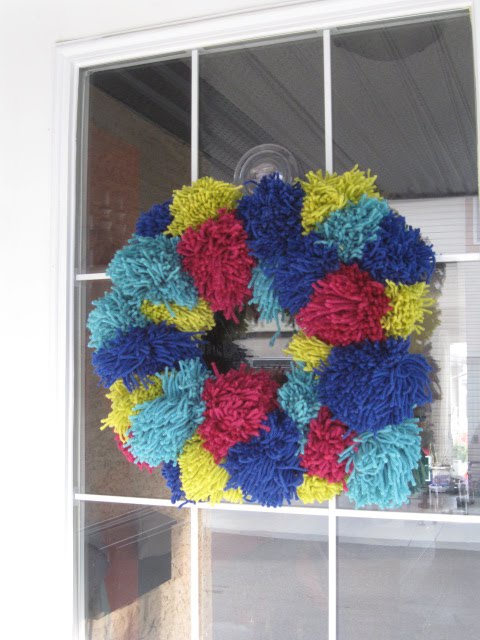
So, I saw this post on honestly...wtf. And I fell in love with pom poms!
And though the girls on the blog made this...
...which is beautiful in itself, I inspired by this photo they linked to:
Both images via http://honestlywtf.com/. I don't think this wreath was made by Erica, so if you know where it's from, let me know.Correction: It WAS made by Lauren and Erica!!! So cute!!!
So, I went about trying to find a pom pom maker here in Calgary. I couldn't find the one they recommended, the Clover brand. But I found this Lion Brand one at Michael's, so I bought it. It was like $3.
But it sucked. Like seriously sucked. You have to thread the yarn through the middle hole and wind it around the circle that way. Which takes forever and is no fun at all.
So, plan B. I searched the web for alternatives and came across this Youtube video:
And that technique looked really easy and fast, and BONUS - I could make myself one of those pom pom trees quite easily! So off to Home Depot I went to get some doweling.
Problem: I did not have a 1/2" drill bit. I had one that was a wee bit smaller. I decided to make do because the new drill bit would have been about $30 and I didn't really want to spend that on something I wasn't sure was going to work. So I used my smaller bit and tried to widen the hole by moving my drill around a bit in the circle. It kinda worked. I wasn't really able to get the smaller dowels to go through the whole way like the ones in the video. So decided just to glue gun them in place.
And I just glued the big dowel to a leftover piece of hardwood flooring.
Now that I've tried it and it works, I think I will invest in the drill bit so I can make an adjustable one, like this one:
Then you can make big pom poms and small pom poms and everything in between!
Okay, so I started making pom poms. I sat on the couch and watched the Food Network all night and drank wine and made pom poms. It was quite a nice evening, actually.
See? Food Network.
This is a cute little pouf!
And then I started to tie them to my wreath frame. And a sneak peak at my cat tent! A post on that is coming soon!
And I kept making pom poms and making pom poms until I got to this!
I sprayed some polyurethane over the pom poms before I put the wreath up to help protect it from the weather.
I like to have a wreath on my front door, and I really like for it to reflect the season. It's finally feeling like spring here in Calgary, a city infamous for its unpredictable weather, so I wanted something cheery. I also wanted something simple, so I bought a can of lime spray paint and a $5 grapevine wreath from Michaels. Then I went to town, and sprayed it probably about four times on each side. I finished it with a coat of clear glossy spray.
Then I used some spare gray fabric (suit lining, actually), and cut a bunch of circles and folded them and sewed them together. I used a technique similar to this one.
You can see the flowers better in the image above than you can on my wreath.
Anyway, I'm really happy with the results, and I just love the colour! It's my new favourite colour, I think.